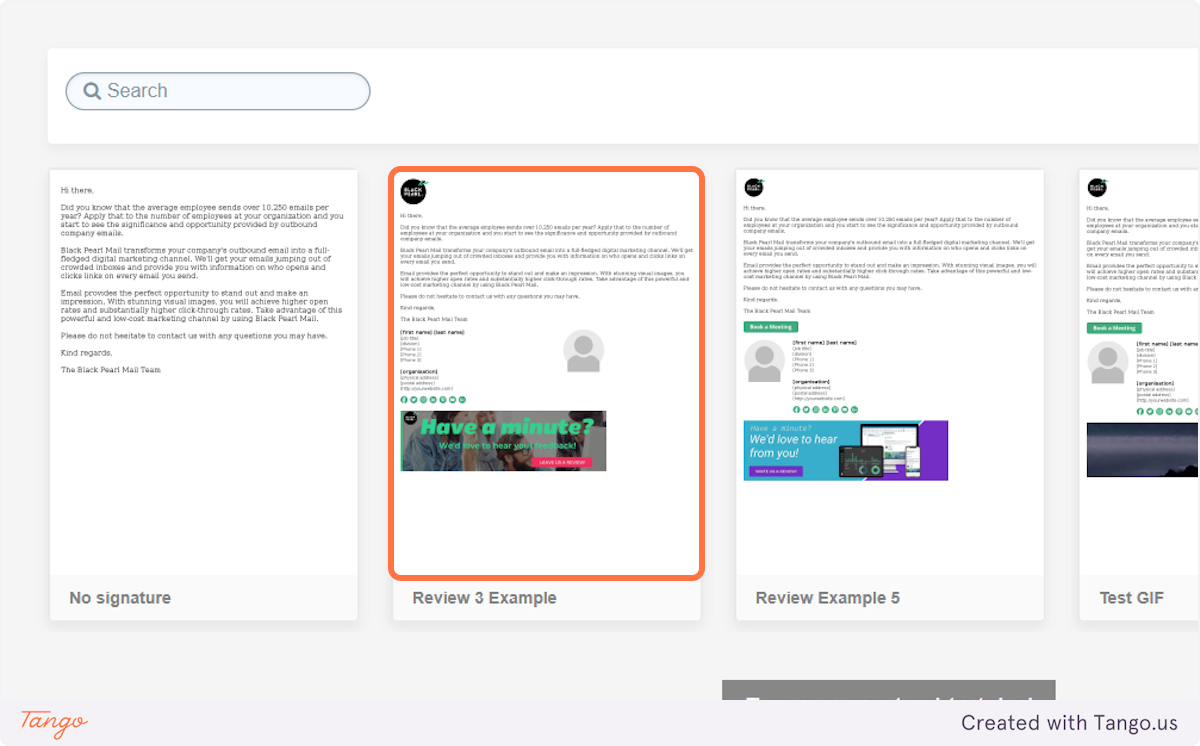
Add your Calendar Booking Link to your Black Pearl Mail Signature
1. Create or edit the template you wish to include your calendar booking on.

We recommend creating a duplicate of this template as you will need a separate template for each staff member who has their own calendar links
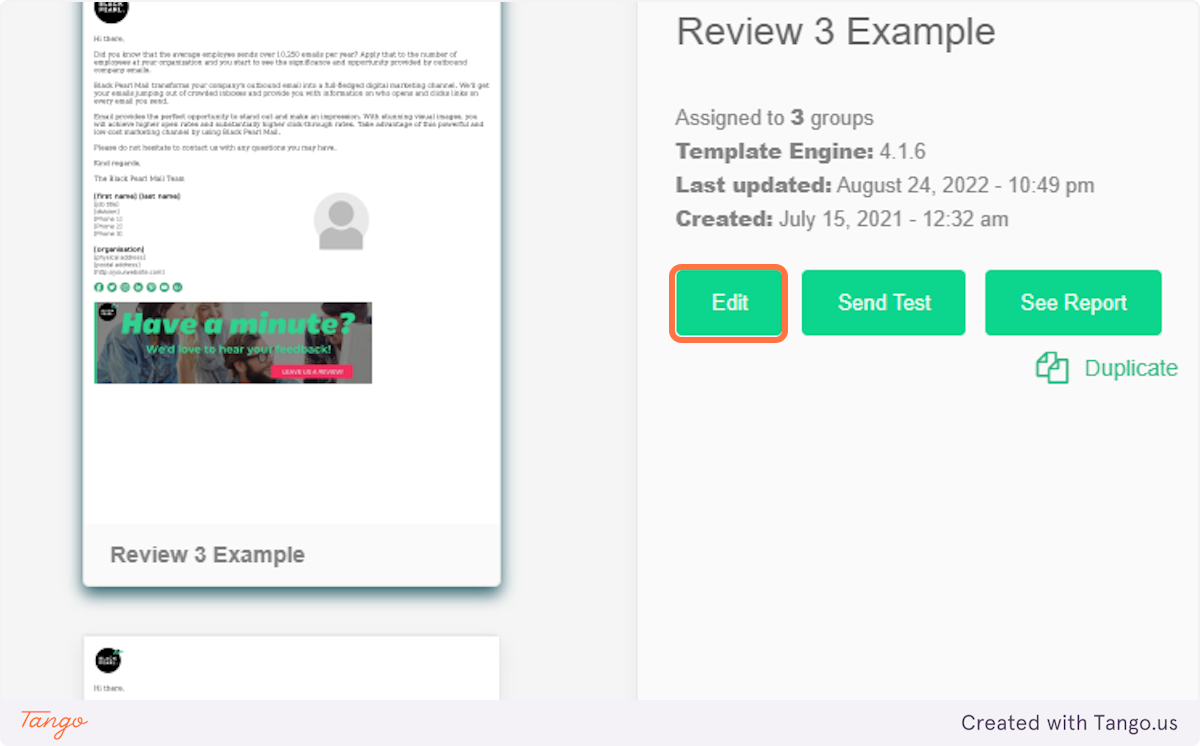
2. Open the template and either click duplicate or edit to change the main template
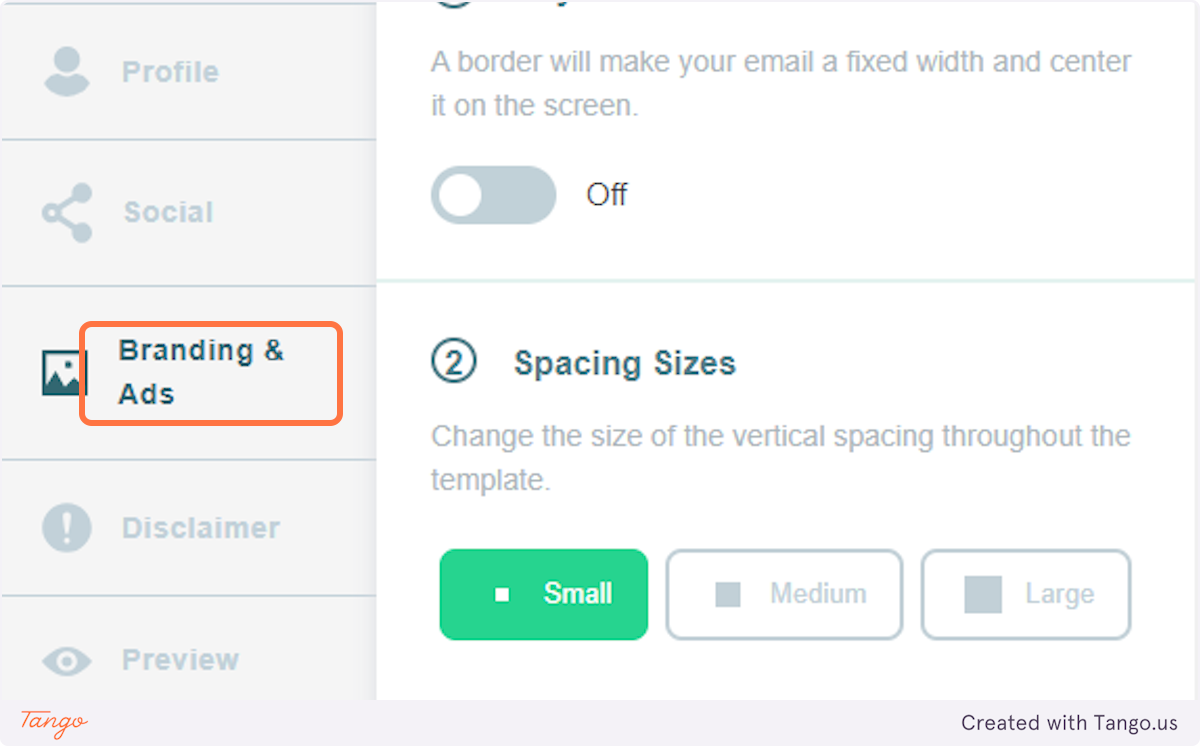
3. Click on Branding & Ads
4. Click on Insert image above signature
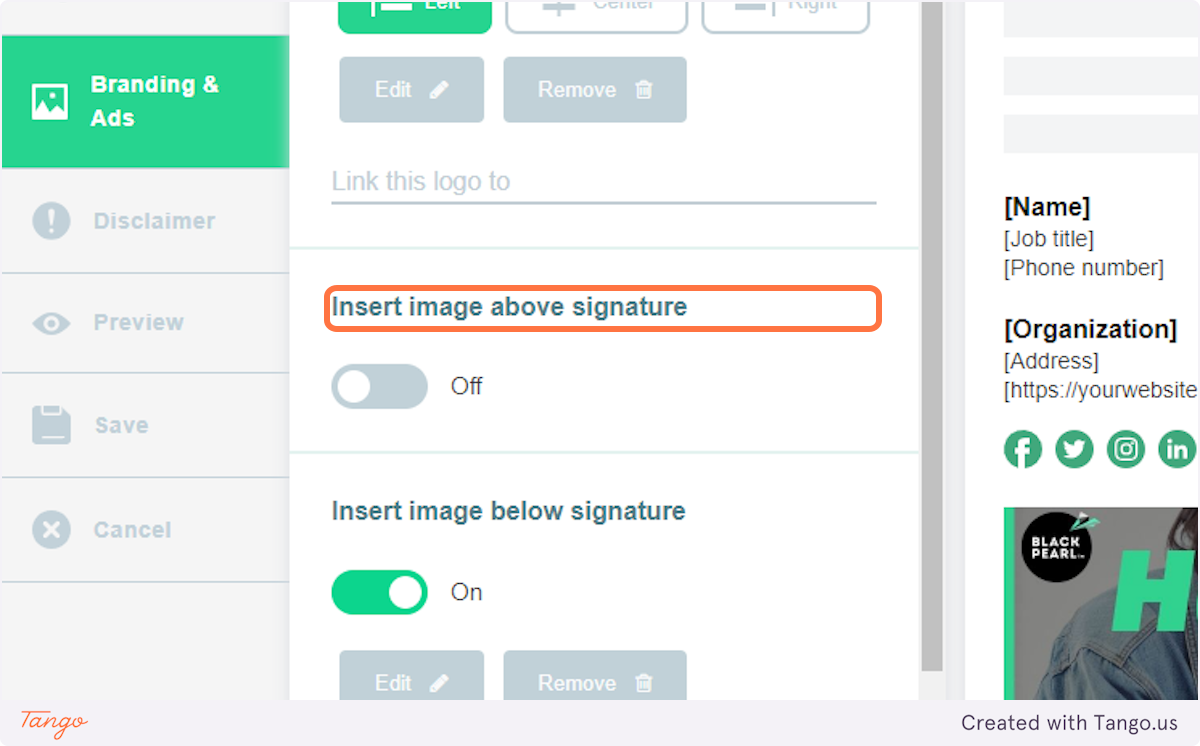
5. Turn On the toggle to enable image adding
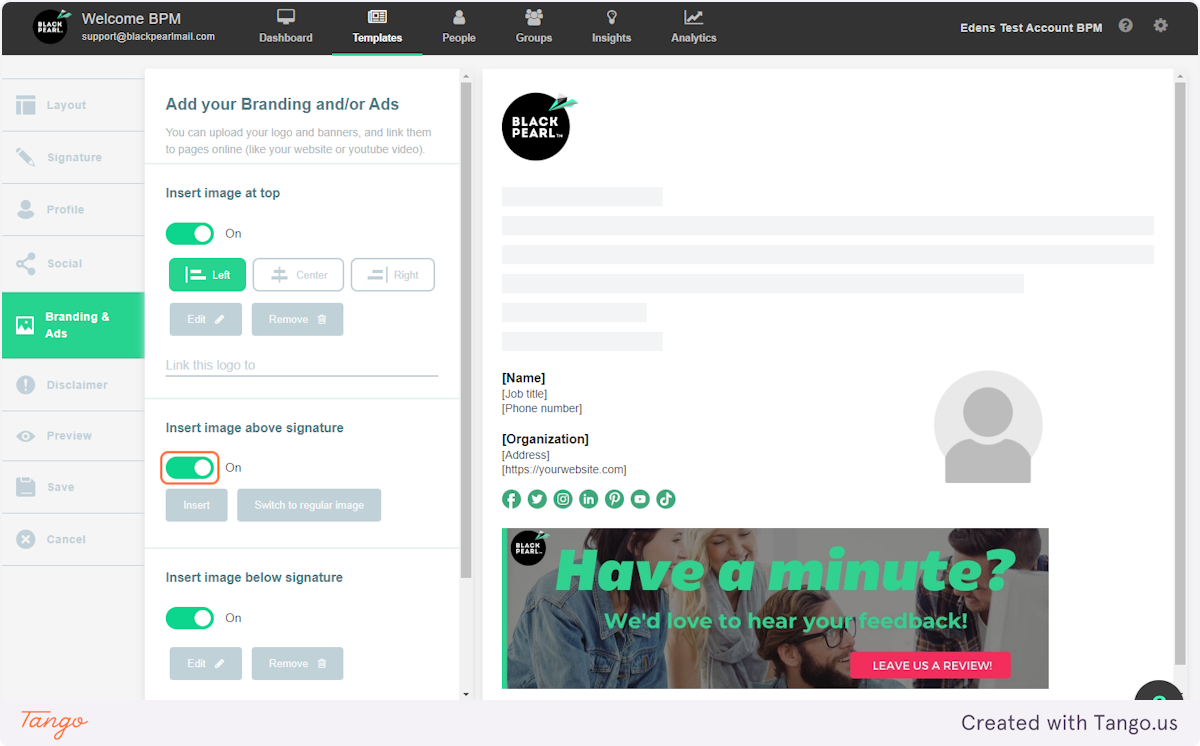
6. Upload an image of the button you would like to hyperlink to the calendar link to. In this case, I created a button called 'Book a Meeting'
You can create buttons to load into your templates via canva, photoshop or any free online creators such as https://www.clickminded.com/button-generator/

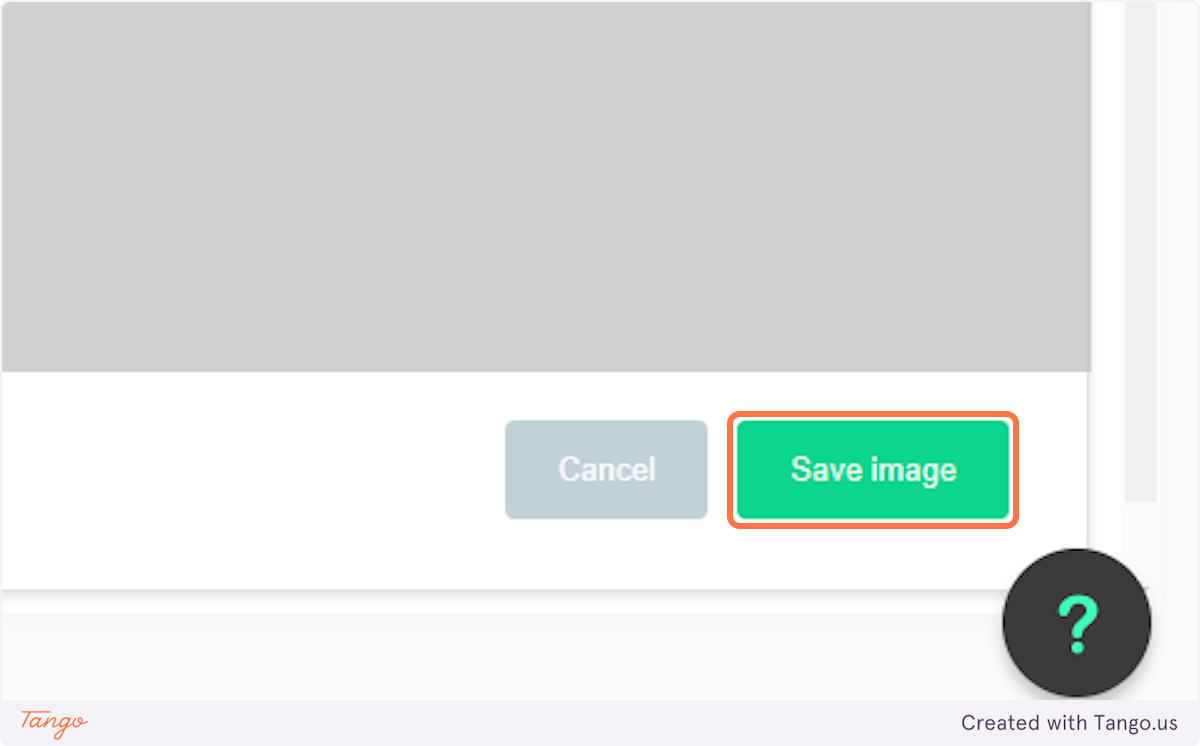
7. Click on Save image
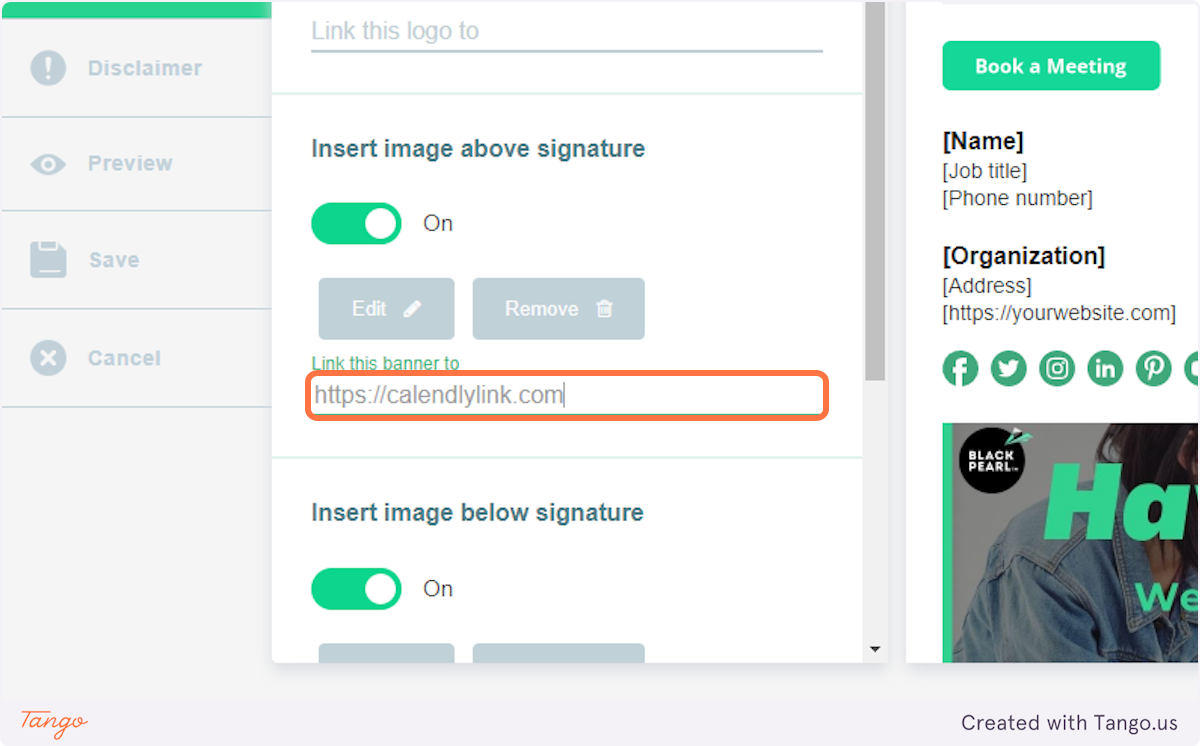
8. Once the image of the button has been uploaded, add the calendar link to the hyperlink section in the left-hand menu
This is why you will need a template for each staff member, as each template will need its own calendar link specific to the person unless you are using a shared calendar link.
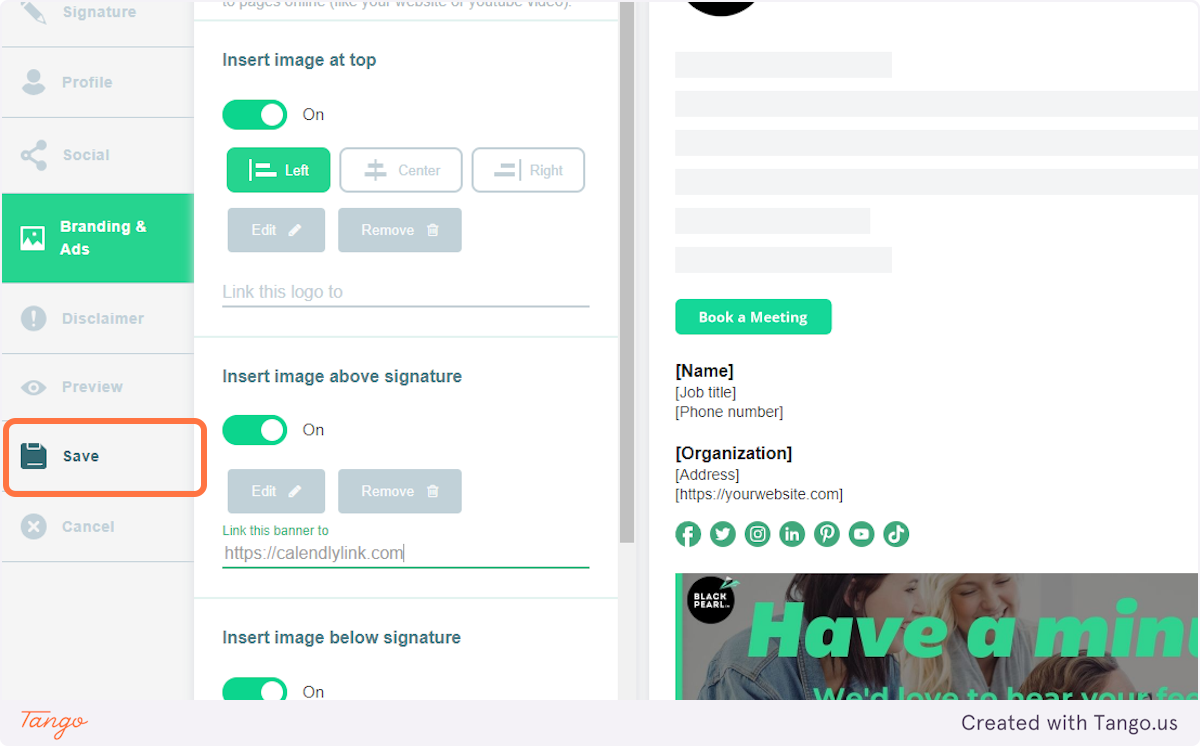
9. Click on Save
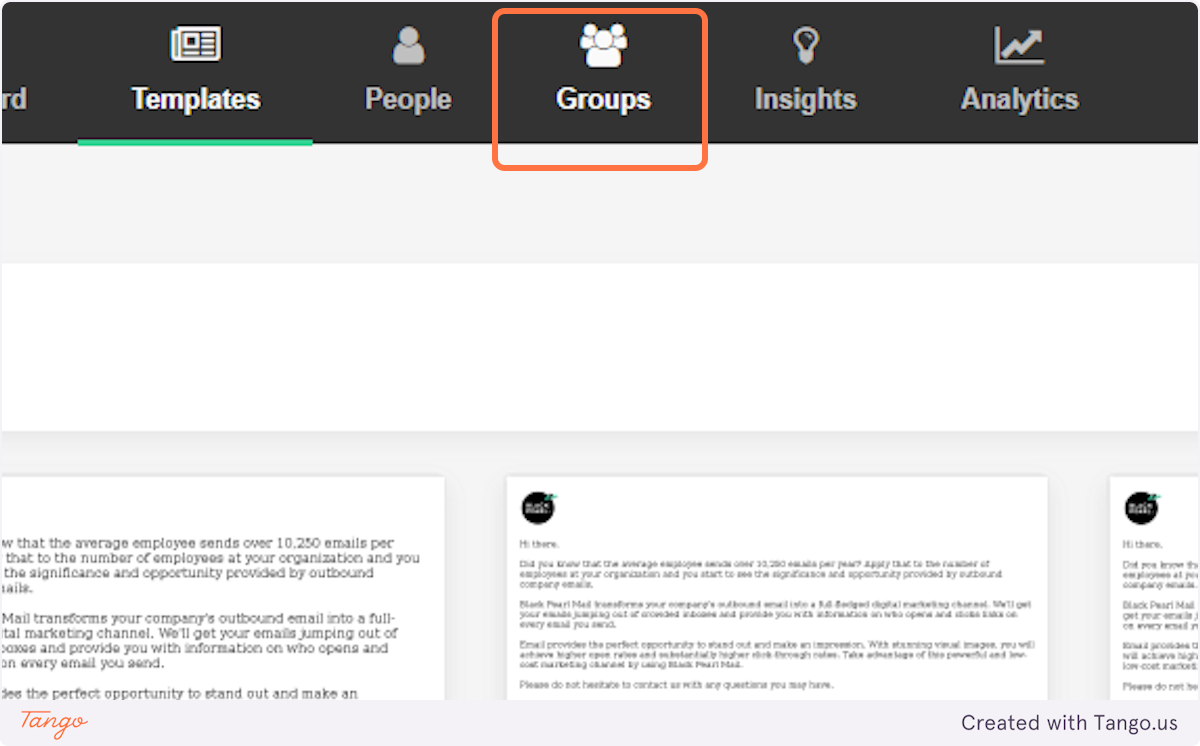
10. Once the templates have been created for each staff member with an individual calendar link, go to Groups
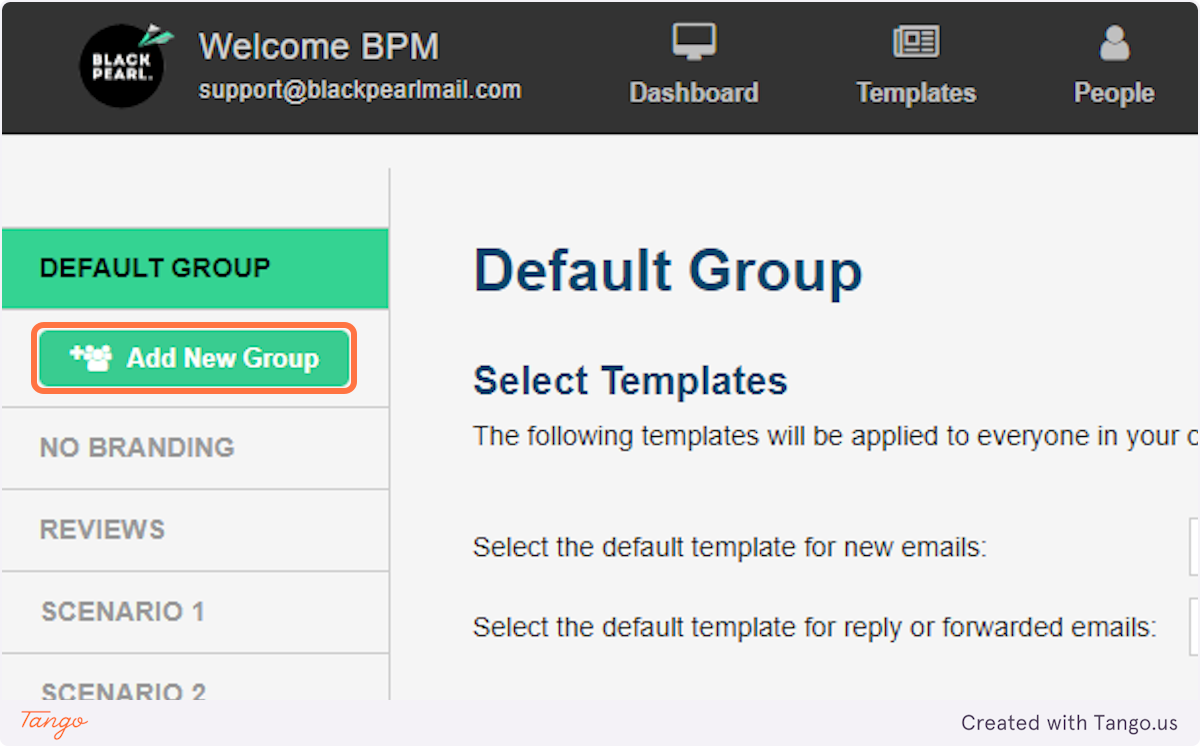
11. Click on Add New Group
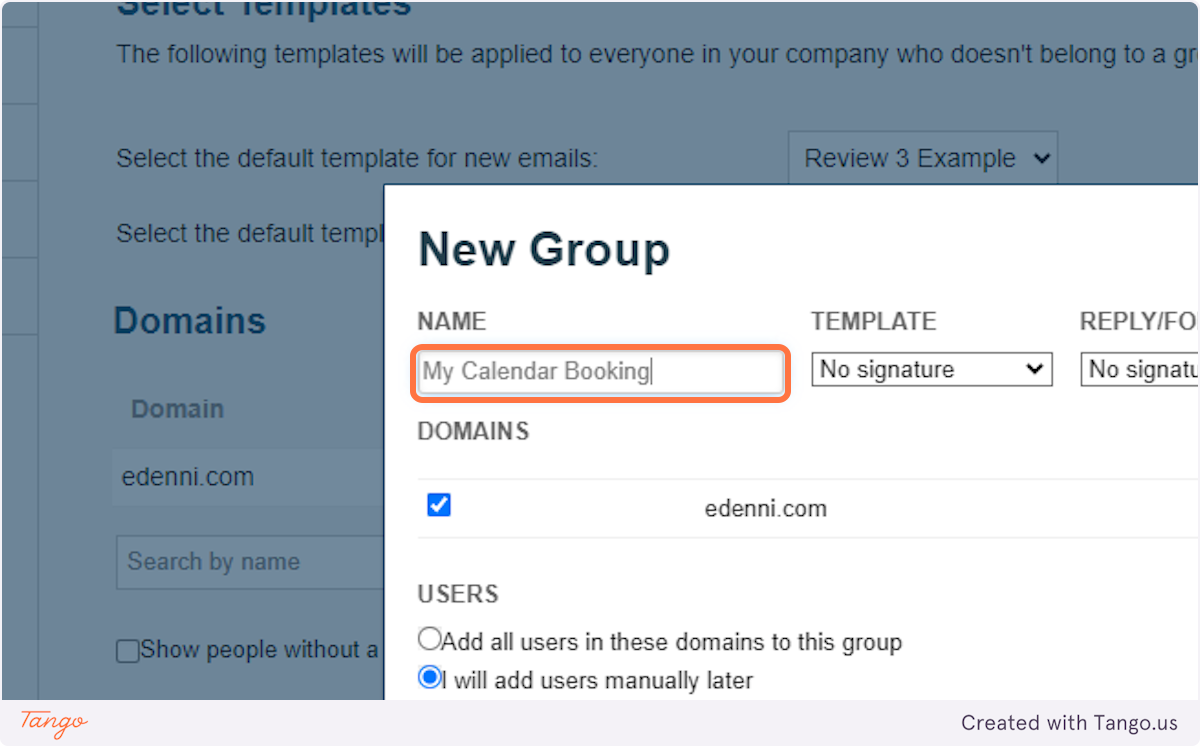
You will need to create a new group for each of the templates you have created. Here you will add the relevant staff member the calendar link relates to as associated with this group
12. Name the group in a way that makes obvious who it relates to e.g. use the staff member's name
13. Set the template you created for them that uses their calendar link as the button as the default
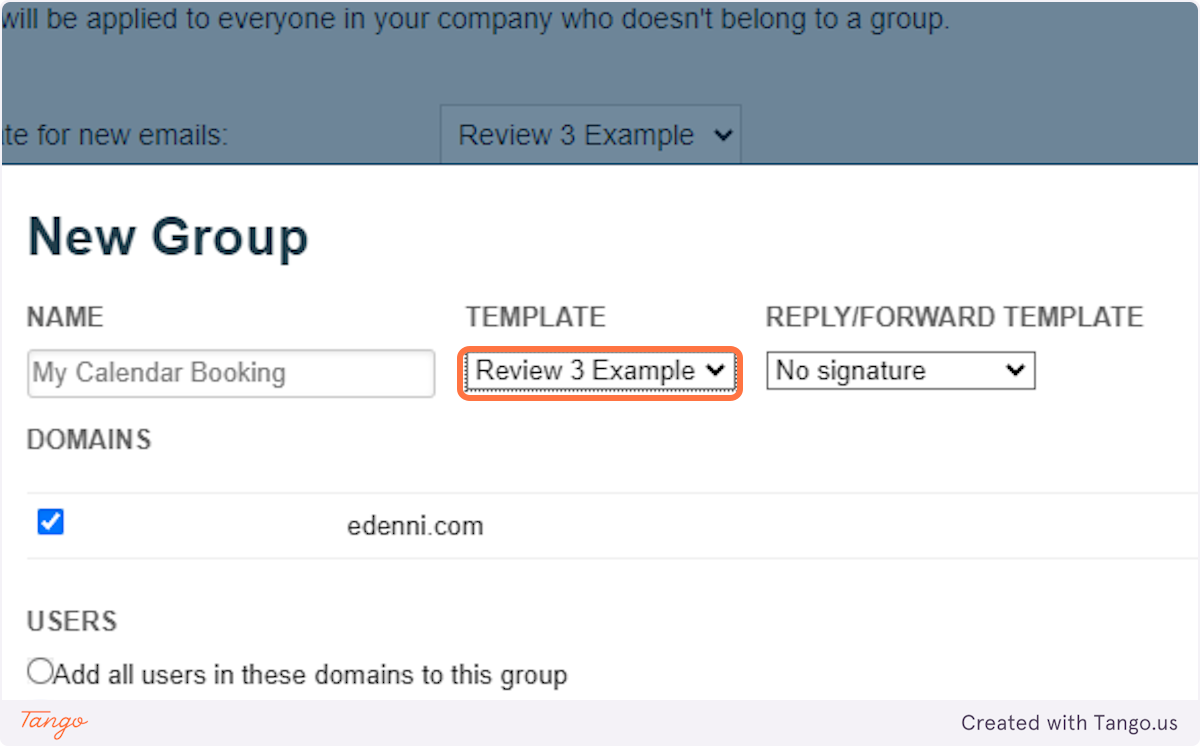
14. You can set the same template for the REPLY/FORWARD TEMPLATE if you want their booking link to be included in all emails
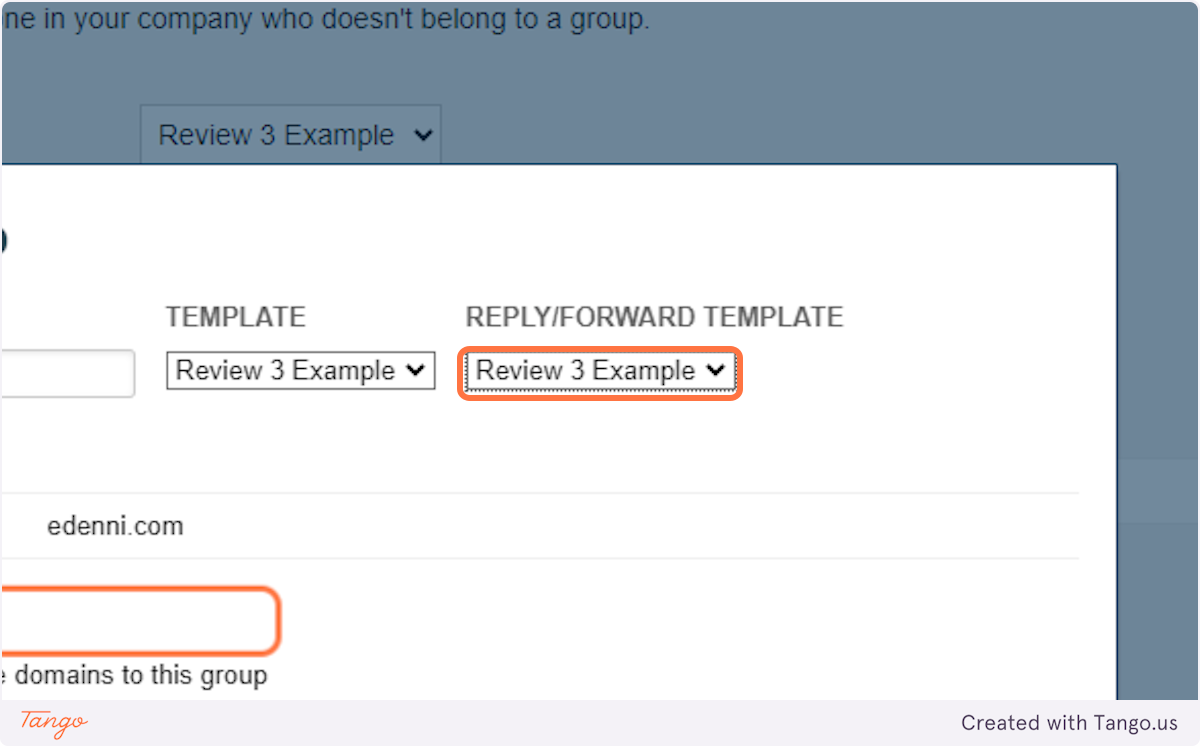
15. Click on Save
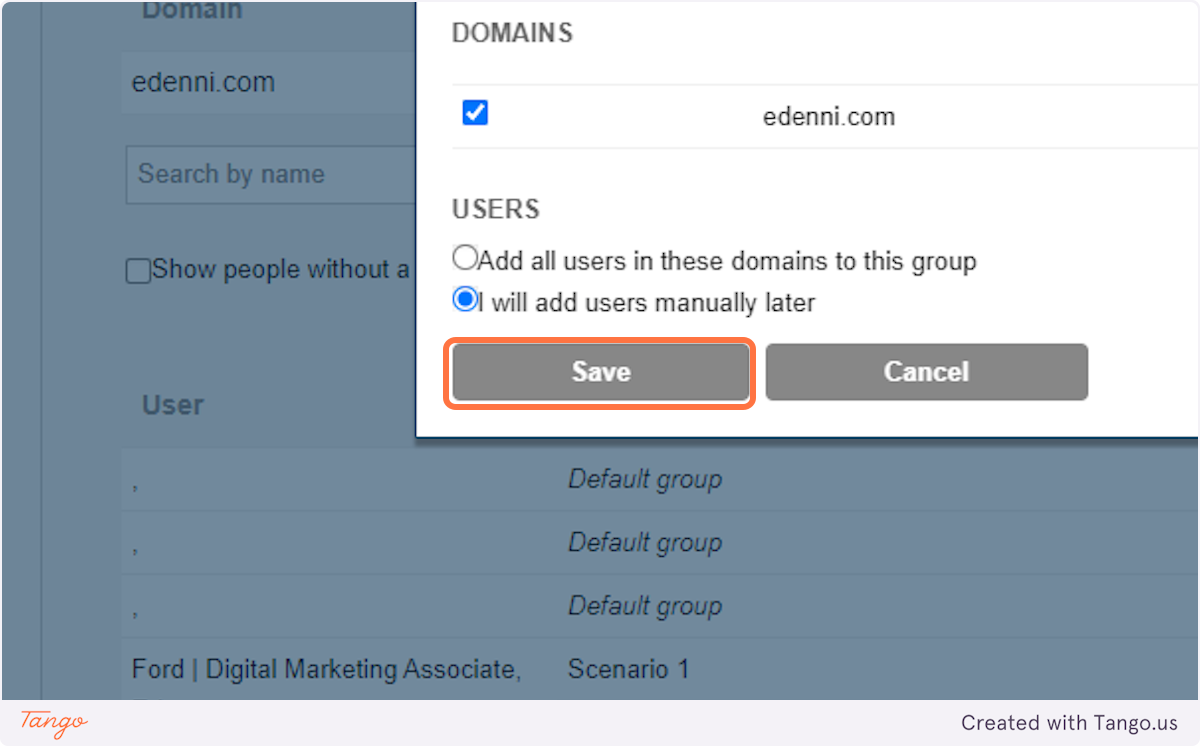
16. Click on Add Users

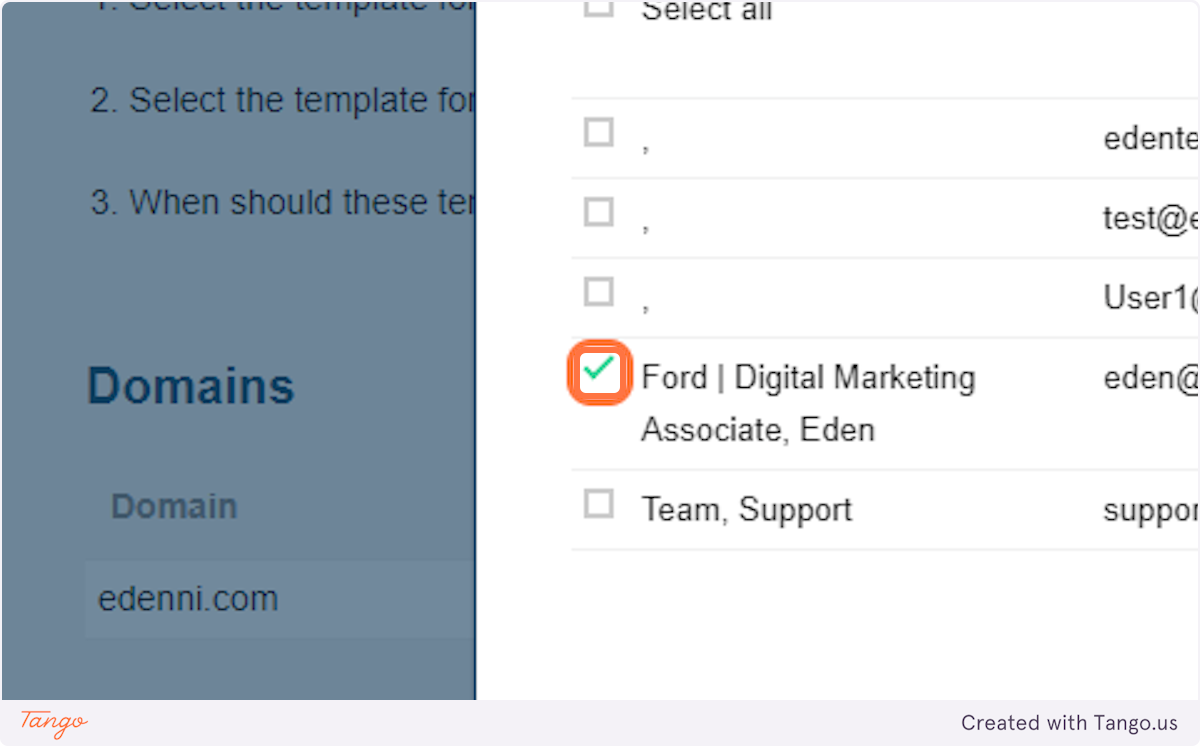
17. Check on the user you wish to associate with the group - this should be the user whose calendar link you added to the associated template
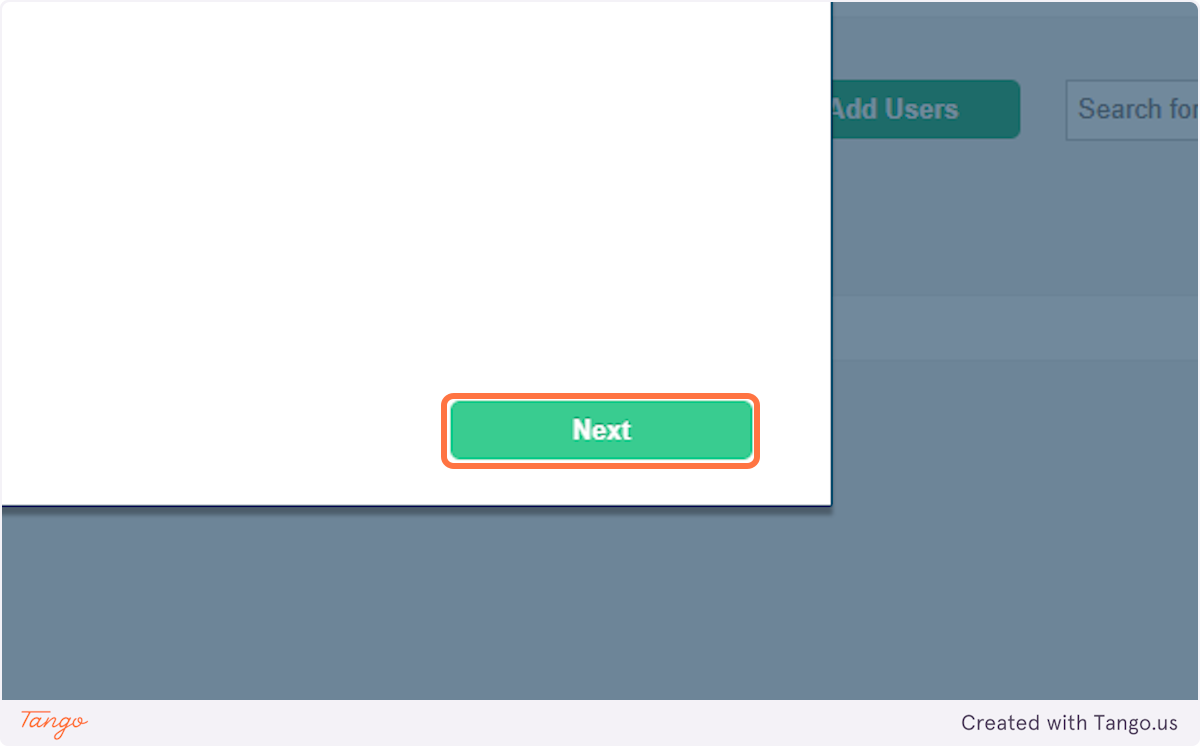
18. Click on Next
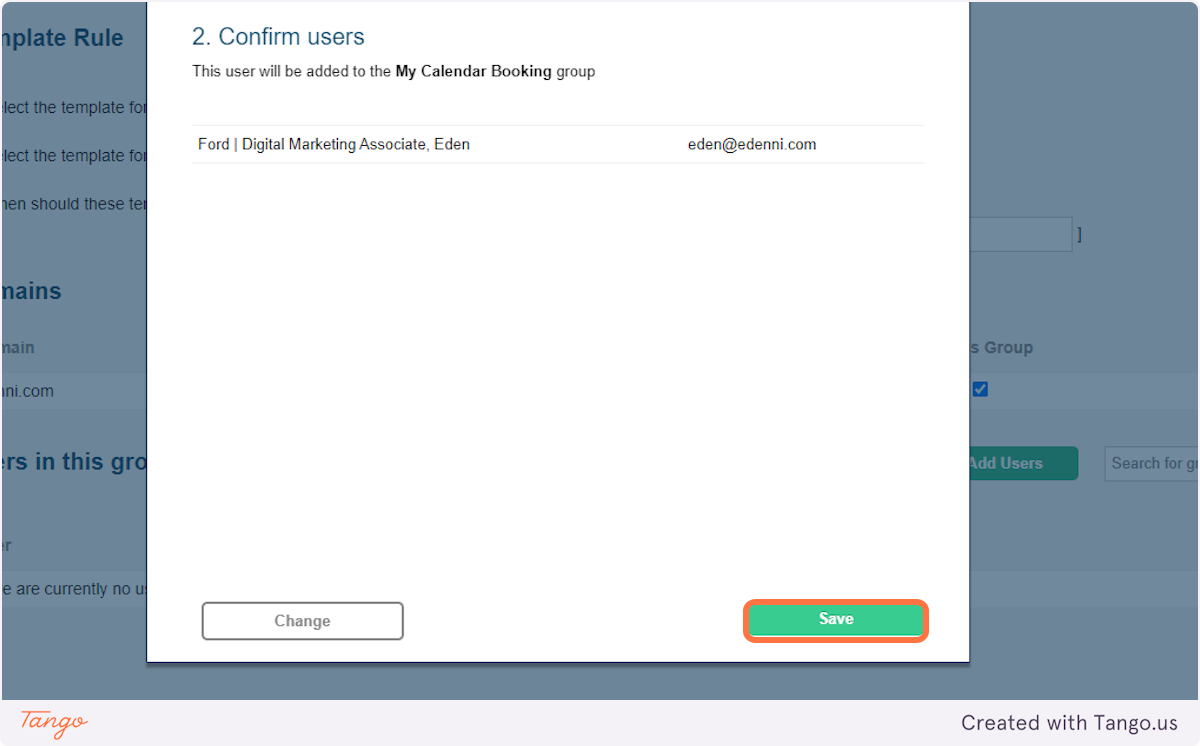
19. Click on Save to confirm the user

If you want the user to have this template used for all emails, you will need to ensure they have been removed from any other groups that are not set to use tags, except the default group as this is locked.
Related Articles
Configure Google Workspace with Black Pearl Mail
These steps will route all of your users through the Black Pearl Mail platform. If you prefer to start with a test/pilot group before rolling out with all of your users, follow these instructions. To carry out the following steps, you will require ...How to create a new Signature Template in Black Pearl Mail (Video walkthrough included)
Step 1: From the Templates Tab, select Add Template. Layout Step 2: Layout Design - Set the layout of your email template. Do you want a border? A border will make your email a fixed width and center it on the screen. Turn it on and select one of the ...Black Pearl Mail - Account Overview of Navigating the Admin Portal
Dashboard The Dashboard Tab is where you can see a 30-day snapshot of activity in your account. This includes the number of emails sent per day over this 30-day period. Templates The Templates Tab is where you customize the design and layout of your ...Configure Microsoft 365 with Black Pearl Mail
These steps will route all of your users through the Black Pearl Mail platform. If you would prefer to start with a test/pilot group before rolling out with all of your users, follow these instructions. The following steps will need to be done within ...SEPTEMBER UPDATE - What's New with Pearl Diver?
We are excited to announce new Pearl Diver updates! Prepare for an enhanced user interface and a solid foundation for exciting upcoming features, all designed to elevate your Pearl Diver experience. Get ready to dive into a whole new world of ...