
How to Set Up Salesforce to Send Through Microsoft 365 or Google Workspace
Route Salesforce email through your Microsoft 365 or Google Workspace mailbox so Black Pearl Mail can brand it.
Black Pearl Mail can only brand Salesforce email that goes out through Microsoft 365 or Google Workspace (formerly G Suite). These steps summarize the setup. For full details, see the official Salesforce documentation.
Turn on external email services
- Log in — Log in to Salesforce.
- Open Setup — Click the cog icon (Setup) in the top right-hand corner.
- Find the setting — In the search box on the left, search for "send through external email services" and select it.
- Turn it on — Turn on either M365 or G Suite.
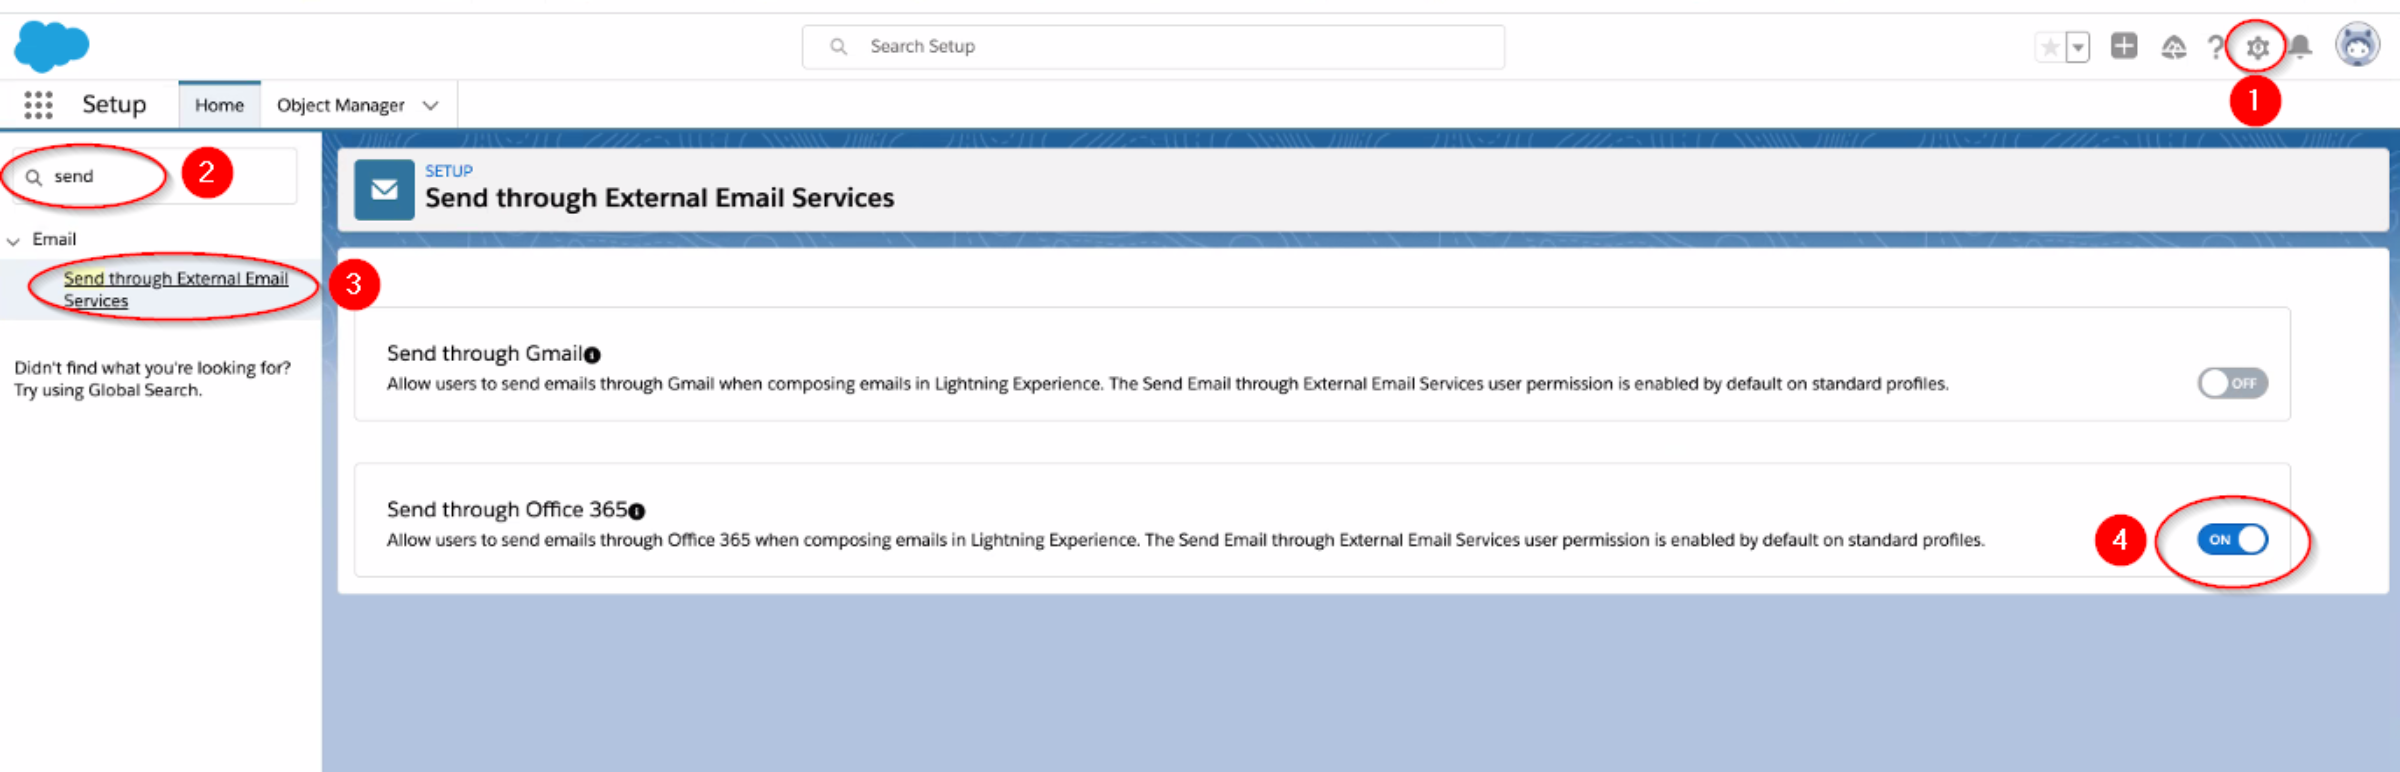
The Send through external email services setting.
Set your email settings
- Open user settings — Click your avatar in the top right-hand corner and select User Settings.
- Open My Email Settings — In Salesforce, go to Email → My Email Settings on the left.
- Choose Send through — Select M365 or G Suite in the Send through option, then click Save.
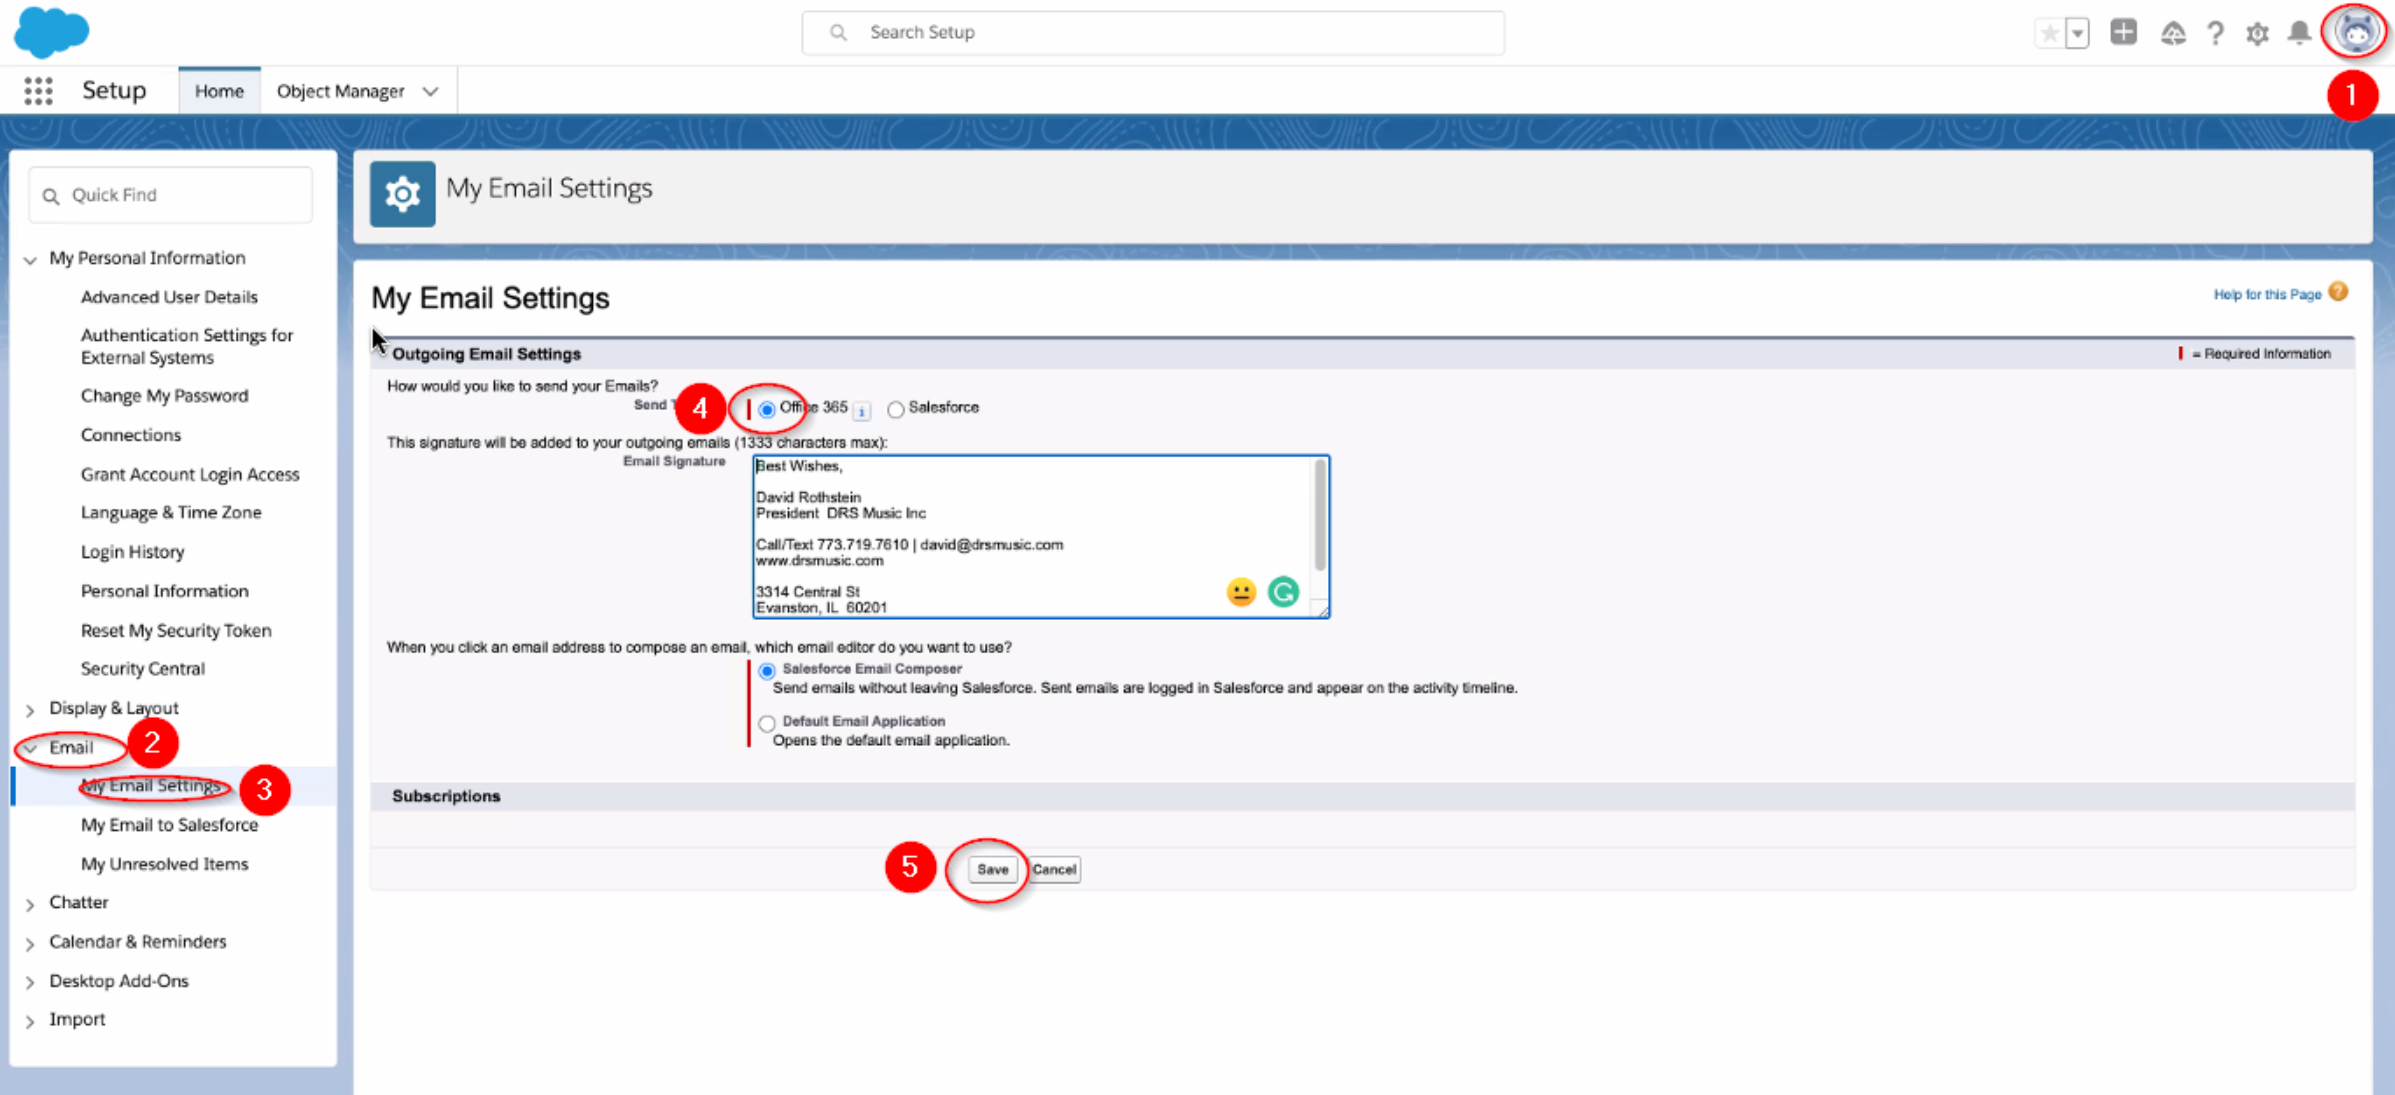
The Send through option in My Email Settings.
Connect and test
- Create a test contact — Create a new contact with the address
[email protected]. You need to send the test from the contacts page. - Start an email — On the contact, click the Activity tab, then Email. A prompt asks you to connect your M365 or G Suite account.
- Sign in — Click the prompt and sign in with your M365 or G Suite credentials.
- Send the test — Send a test email and check its headers to confirm it passed through M365 or G Suite and Black Pearl Mail.
Need help? Visit the Black Pearl Mail Help Centre or book a support session with the team.